Plain-language quick mastery of WorkBuddy: For ordinary people to embrace AI, start with learning by doing.
In the AI era, as long as you learn slowly enough, you don't have to learn at all.
At the peak of OpenClaw's popularity earlier this year, to raise a "lobster", some people specifically bought Mac mini, others started catching up from the command line, installed environments, configured models, researched Skills, and fought wits and courage with various errors along the way.
Although the process was quite cumbersome, this lobster craze also made many people realize for the first time that the destiny of AI is not just chatting, but also to help users complete some tasks that originally required repeated operations sitting in front of the computer.
Half a year later, features such as Skills, automation, and remote control that previously required self-built environments to experience are now being integrated into out-of-the-box products, including the currently trending WorkBuddy.
However, for people who are new to such products, the most common questions remain: what exactly is the difference between WorkBuddy and models like DeepSeek? How to use it properly? More importantly, which of my daily work tasks are really worth assigning to it?
So this article will not discuss the complex principles of Agent, nor will it expand on various technical concepts. We will start directly from actual usage scenarios to see what it can do, and how ordinary users can get started quickly.
Interface Manual (Plain Language Version)
WorkBuddy currently supports Windows and macOS.
For Windows, Windows 10 and above are required; Windows 7, 8, 8.1 cannot run it. After downloading the official installation package, follow the installation wizard to complete the setup.
For Mac, macOS 12 Monterey and above are required. Note the difference in chips: M-series Mac downloads the ARM64 version, Intel Mac downloads the X64 version.
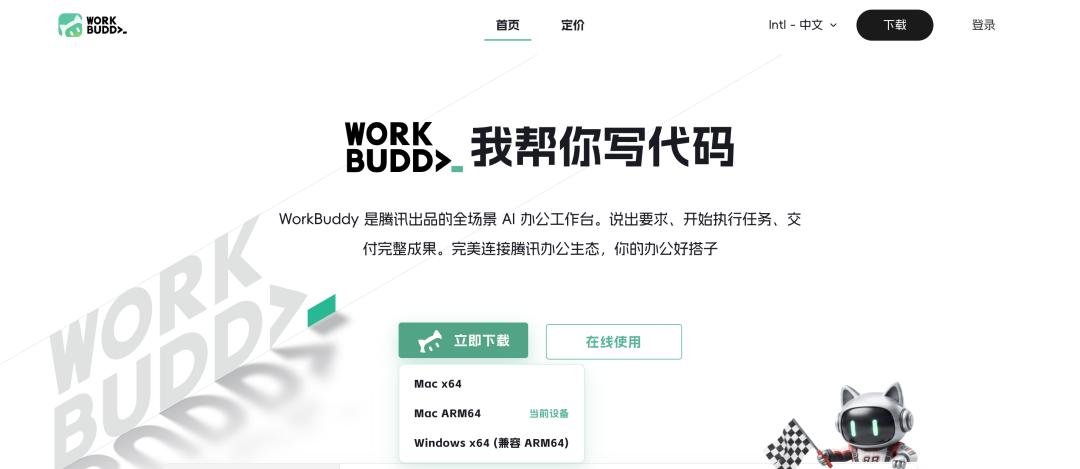
After installation, when you open WorkBuddy for the first time, the brand-new interface will inevitably make many users feel a sense of familiarity mixed with strangeness.
It feels familiar because it still looks like a chat tool. It feels strange because next to the chat window, there is a complete set of work areas centered on tasks, files and tools.
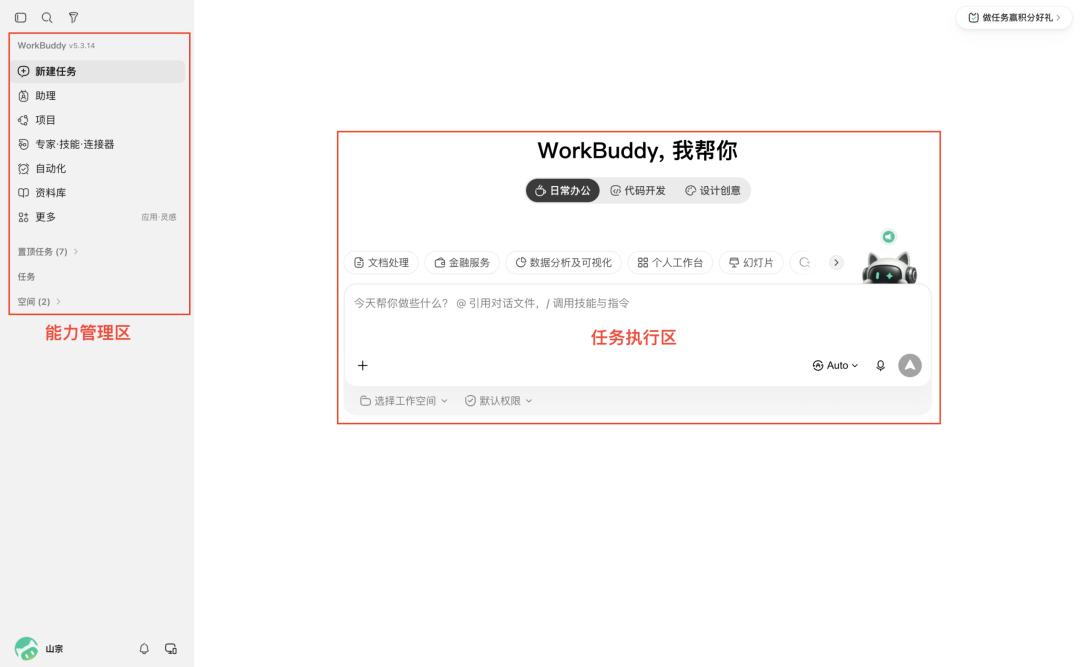
- Left side, Capability Management Area: covers main functions such as New Task, Assistant, Project, Expert, Automation, Knowledge Base, and Skills.
- Middle, Task Execution Area: users can input requirements, upload files, select models, Skills and workspaces, then let WorkBuddy start executing tasks.
- Right side, Result Management Area: here you can view the files generated by WorkBuddy, materials in the current workspace, file modification records, and web page previews.
The official divides the right sidebar into several sections: "Outputs", "Workspace Files", "Changes", and "Browser".
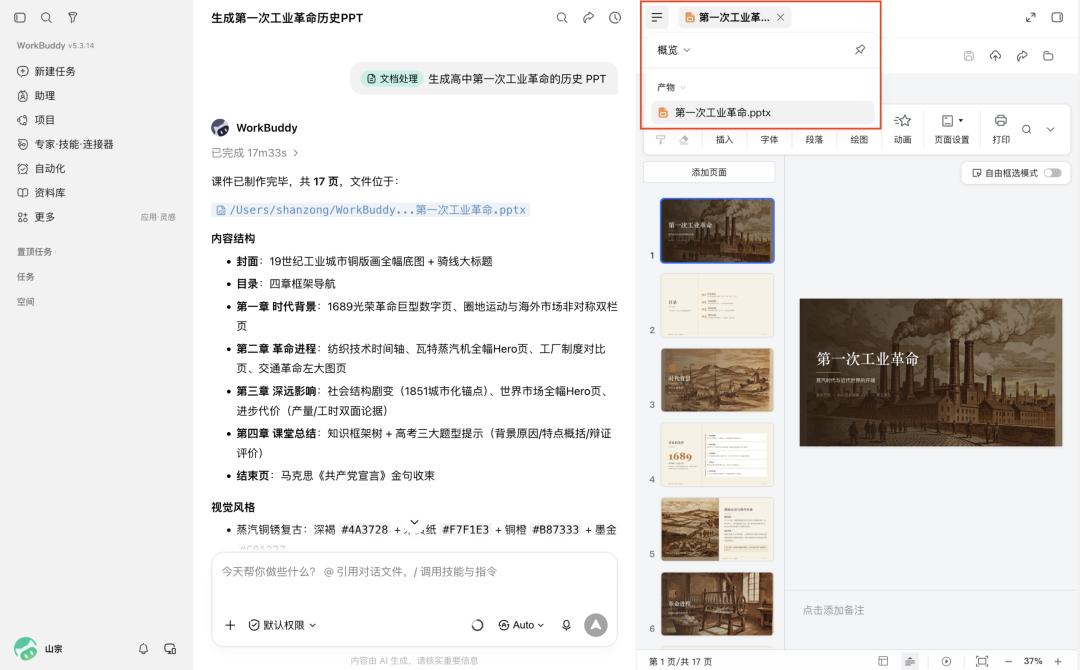
When using it for the first time, the most important thing to distinguish is "Chat Reply" and "Outputs".
For example, if you ask WorkBuddy to make a PPT, the middle area shows the execution process, and the actual generated PPT file will appear in the "Outputs" section on the right.
If it modifies an existing file, the "Changes" section can also show exactly what adjustments have been made.
The Correct Way to Understand the Buttons
Faced with the long list of functions on the left, many users may feel overwhelmed at the beginning. But in fact, their core logic is only one: to enable AI to not only answer questions, but also help office workers get work done.
In short, don't tell AI what you want to know, tell it what you ultimately want to accomplish.
Inspiration: Don't know what to ask AI to do? Copy existing cases first
Following existing examples is the fastest way to get started with AI.
Most people say AI can do anything, but few people actually tell you where this "capability" is specifically reflected. Fortunately, there are ready-made answers to many questions.
For people who are new to WorkBuddy, my suggestion is very simple: when in doubt, check the "Inspiration" section first.
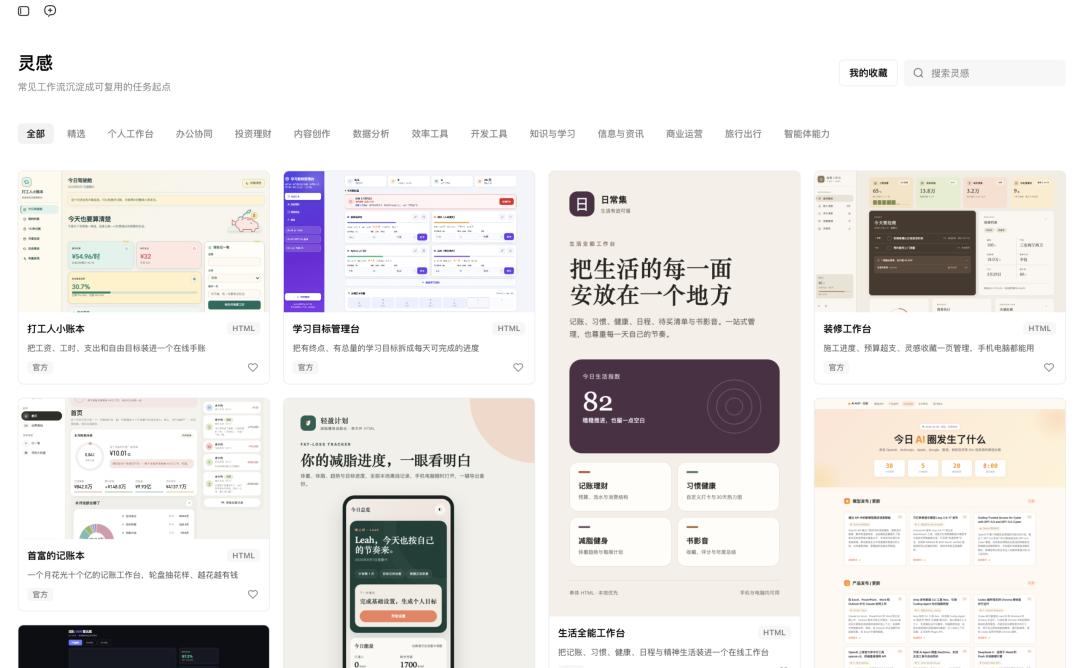
"Inspiration" is more like a library of AI task cases, where you can see how other users use WorkBuddy to create web pages, process documents, analyze data, produce content, etc., and then learn by imitating.
For example, when you see a case of automatically generating weekly reports, you may think that your daily reports and meeting minutes can also be handed over to WorkBuddy; when you see a data analysis case, you may also think about your own industry report sorting work.
Most of the time, the way to use AI does not come from learning a certain skill, but from re-observing your own work process.
New Task: Learn to assign work, that's when you really get started
In daily use of WorkBuddy, most work starts from creating a new task.
Compared with ordinary chatbots, the biggest difference is that what you assign to it should not just be a question, but a complete piece of work.
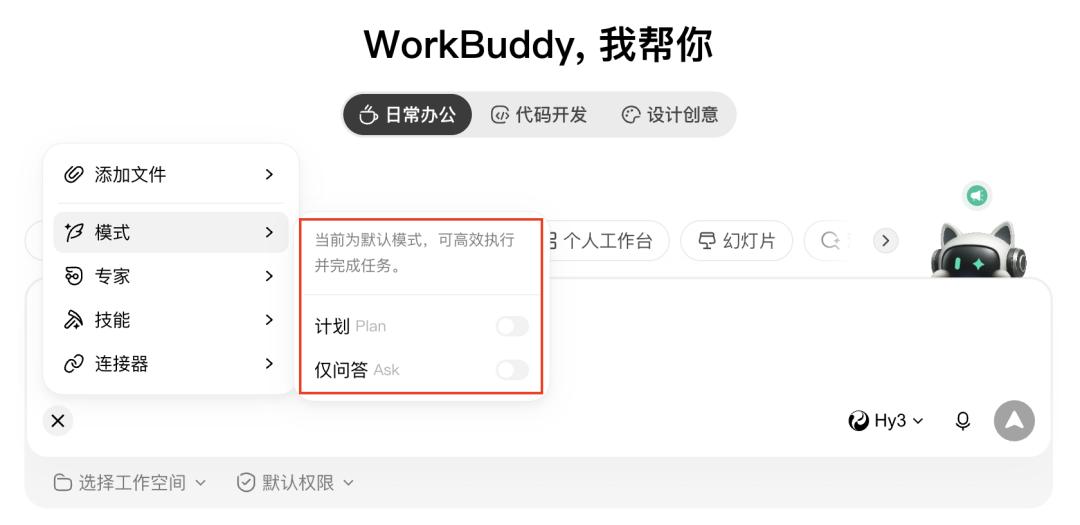
When creating a new task, WorkBuddy provides modes such as Plan and Ask (Q&A only).
As the name suggests, the Plan mode will first plan the task, and execute it after you confirm; while the Ask mode is suitable for asking questions and brainstorming, and cannot perform execution actions.
For example: "Help me summarize this article." This is something ordinary AI is very good at. But "Read 20 industry reports in the computer folder, sort out the AI mobile phone market trends this year, and generate a PPT." is a task that WorkBuddy is more suitable for handling.
Because it can not only understand the content, but also continue to read files, call tools, and generate outputs around the goal.
This also perfectly explains the difference between WorkBuddy and models such as DeepSeek and Kimi.
Large language models are more like the brain responsible for thinking, for understanding, reasoning and generating content.
WorkBuddy is more like a working environment that organizes models, local files, Skills, tools and task workflows, allowing the model to continue to perform subsequent actions.
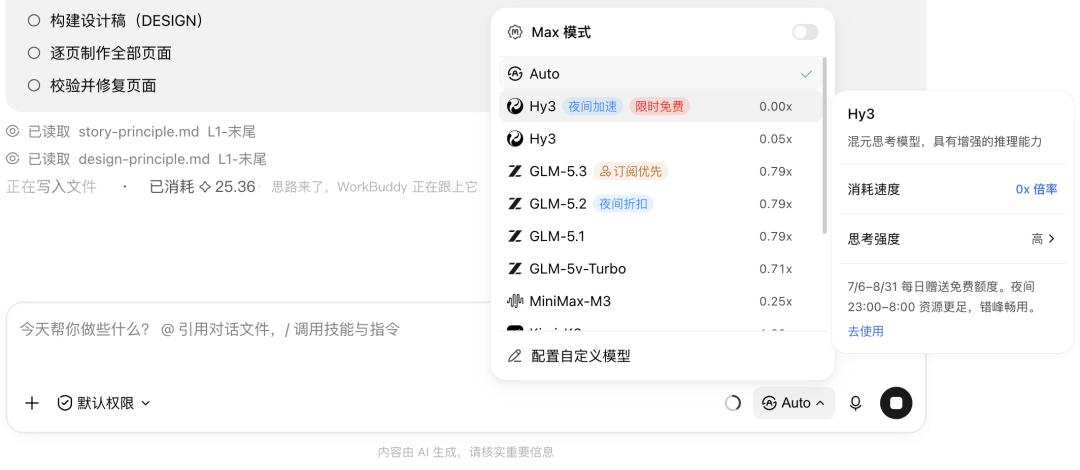
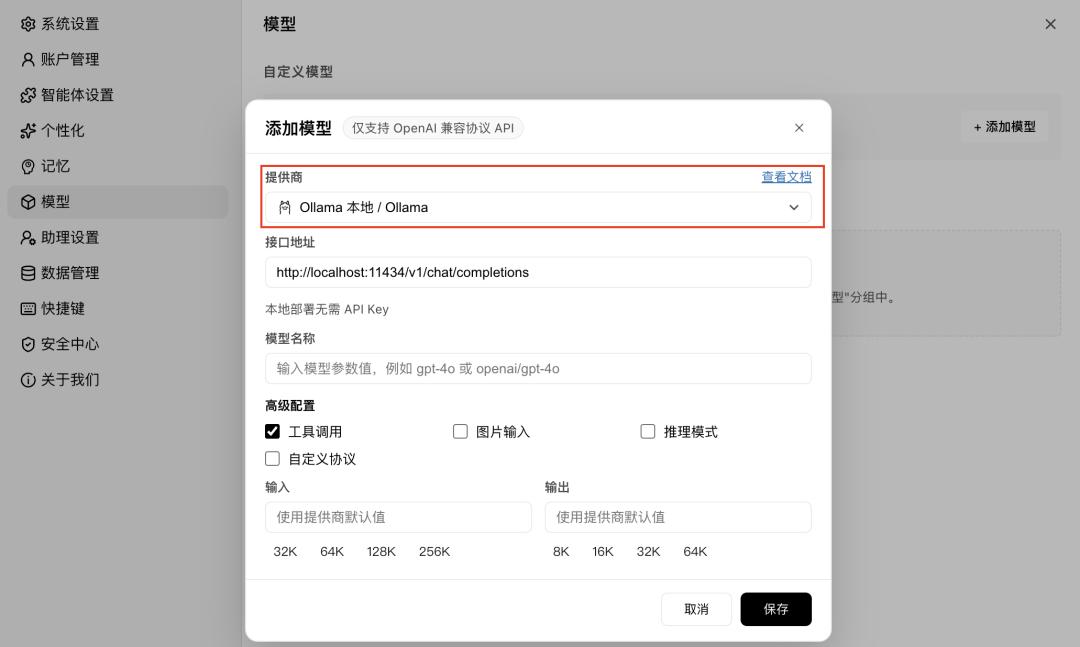
In addition, WorkBuddy with high flexibility also has multiple built-in models, and supports users to add third-party models. On the model page in settings, you can configure information such as API Key and model address, and also connect to locally deployed large language models.
The specific operation is also very simple. First open WorkBuddy, enter from the lower left corner:
Settings → Models → Add Model
After entering the model configuration page, you can see several access methods:
The first one is to directly select an existing model provider.
If WorkBuddy has pre-set the corresponding service, you only need to select the provider and fill in the API Key. The system will automatically complete the interface address and related configurations.
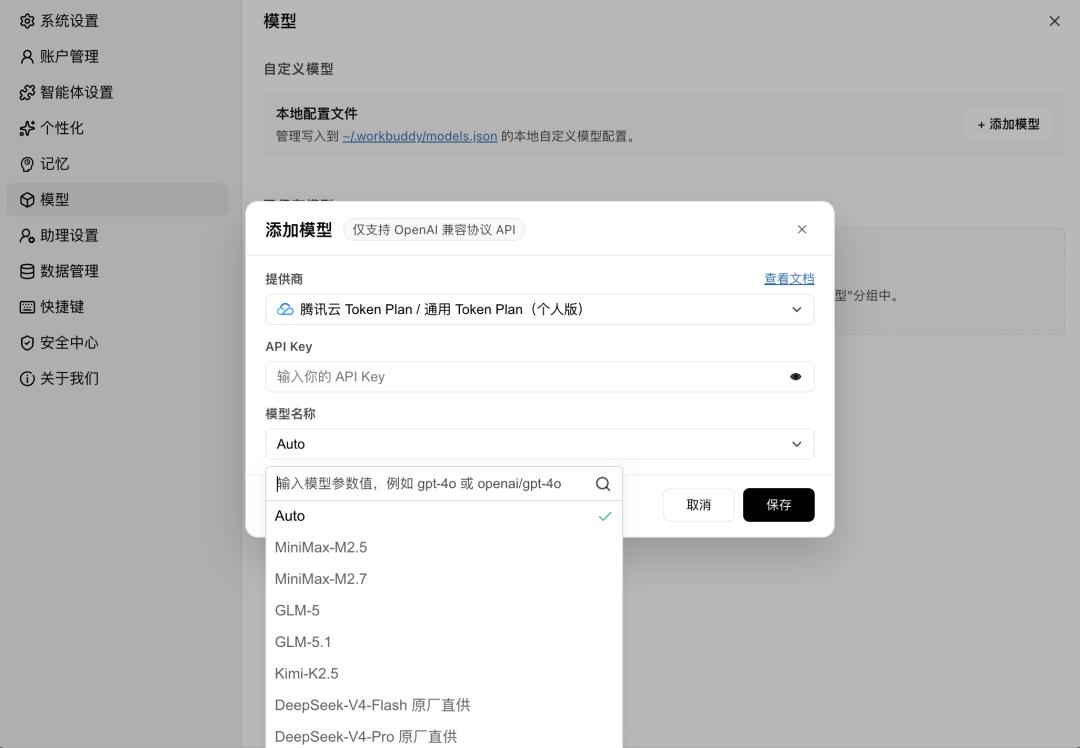
The second one is custom API. If your model service is not in the list, you can select "Custom", and manually fill in three pieces of information:
- Interface Address (URL): the API address provided by the model service provider.
- API Key: This is the identity credential for calling the model, which generally needs to be applied for on the corresponding model platform.
- Model Name: Fill in the specific model ID to be called, such as the name of a certain DeepSeek model.
The third one is to access the local model. Ollama itself is a tool for running local models, which will provide an interface compatible with the OpenAI protocol after startup, and WorkBuddy can connect directly. The advantage of this is that data will not be uploaded to the cloud, and it will not consume Tokens of third-party APIs.
However, for most ordinary users, there is no need to study local models at the very beginning. For the first use, it is more recommended to experience the built-in models first, or connect to the models for which you already have API access.
After saving, this model will appear in the model selection list of WorkBuddy, and you can directly switch to use it when creating new tasks later.
Different tasks are suitable for different models. For example, writing, data analysis, visual understanding and complex reasoning have different priorities for model capabilities. Choosing the right model often leads to better results.
Assistant: You are off work, but your AI can still work
If you are not next to the computer, can WorkBuddy continue to work?
In the past, using AI usually required you to sit in front of the computer, open the software, input requirements, and then wait for the results. But if AI really enters daily work, it should not always wait for the user to sit in front of the screen.
The Assistant feature of WorkBuddy extends this entry to the mobile terminal.
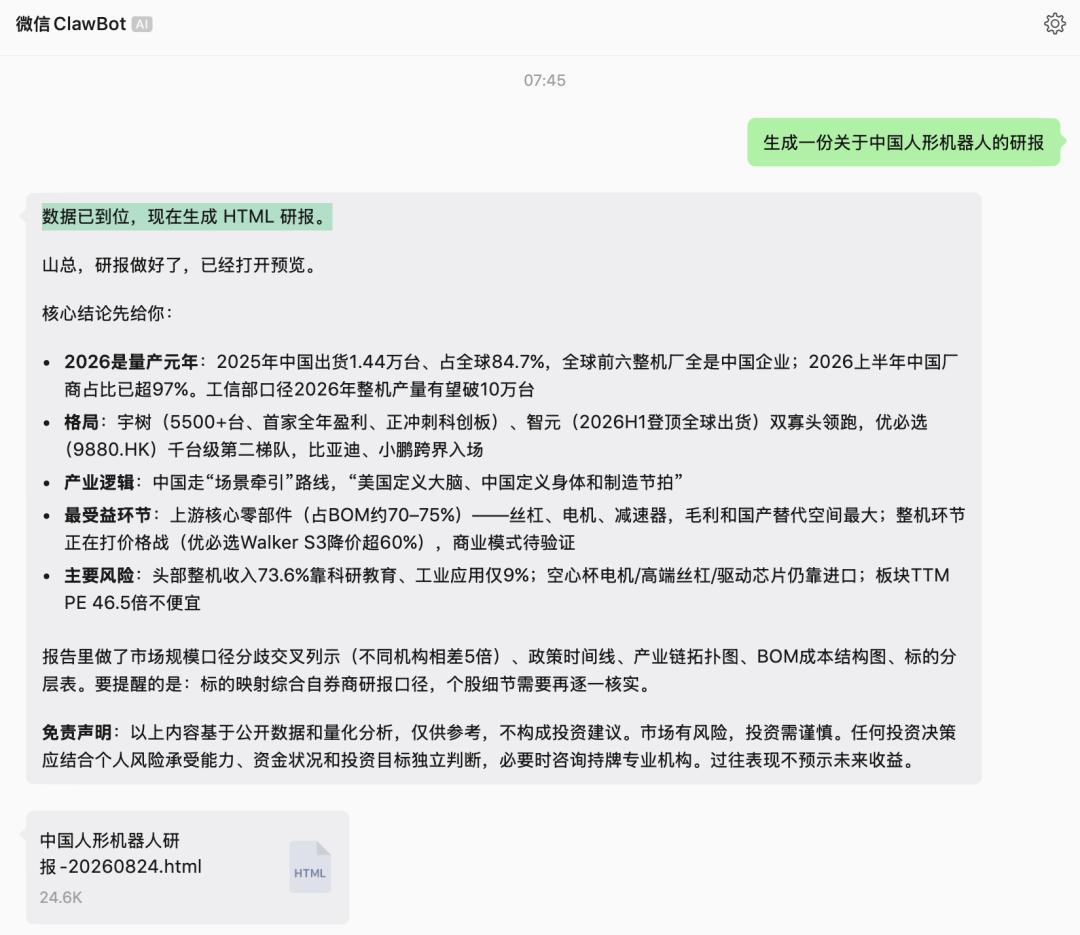
After keeping the WorkBuddy desktop client running, users can send tasks to it from their mobile phones through WeChat, WeCom, QQ, Feishu, DingTalk and other platforms, and then receive the execution results.
For example, if you suddenly remember on your way off work that you need to organize meeting materials tomorrow, you can directly send:
Help me read the materials in the "Today's Interview" folder on the computer, and sort out an interview minutes.
WorkBuddy on the computer will continue to execute the task, and synchronize the results back after completion.
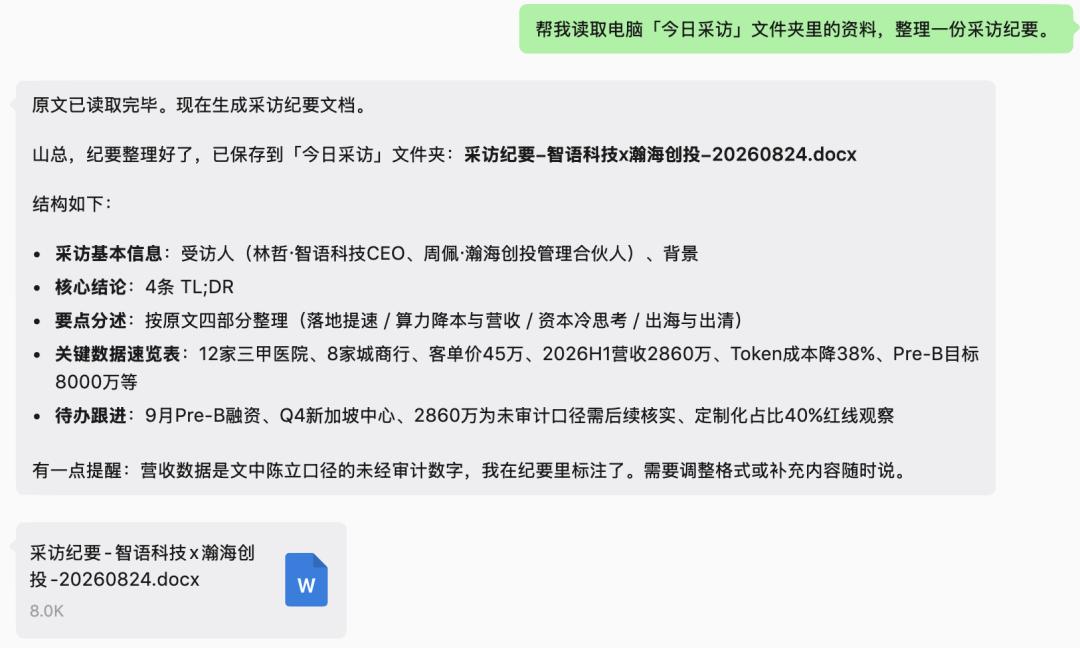
For individual users, the easiest way at present is to connect to the WeChat Assistant.
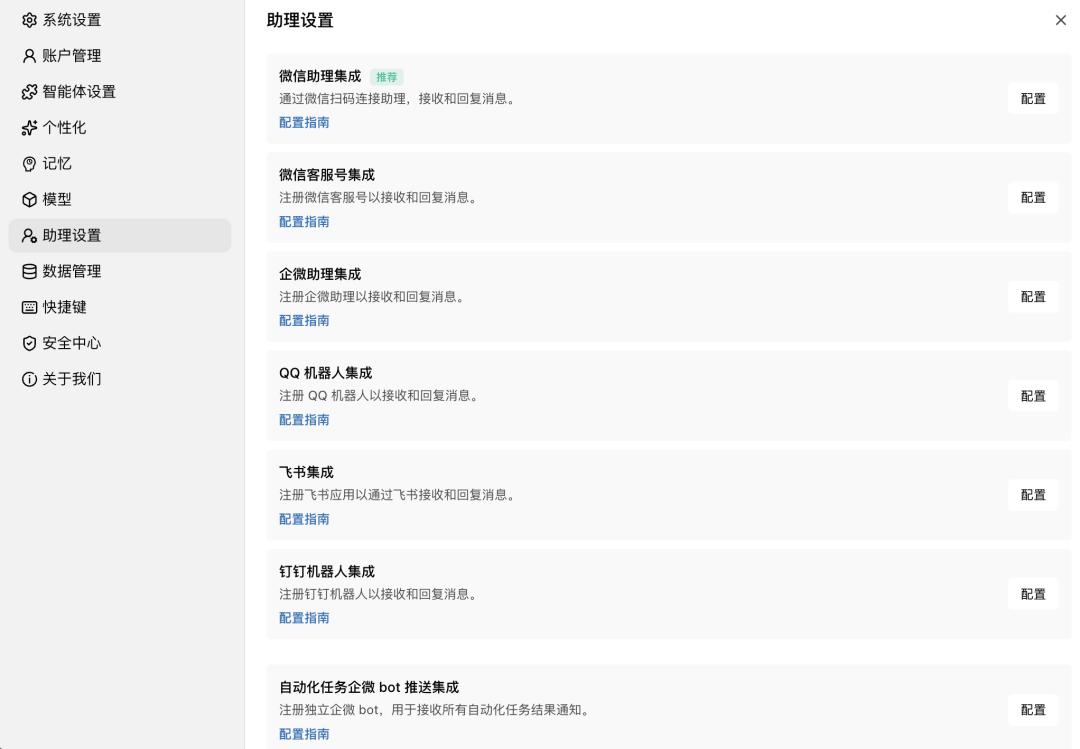
Enter the Assistant settings, find the WeChat Assistant, generate a QR code and scan it to bind. For long-term use, please note that the computer needs to keep running, and you can enable the anti-sleep settings to prevent the computer from entering sleep mode and interrupting remote tasks.
Project: One instruction, long-term validity
If creating a new task solves the problem of "what to do now", the Project solves the problem of "continuously working on one thing for a long time".
For example, to operate a brand, you can create a project, and put all the brand materials, historical reports, writing requirements,