Crash Course to Master DeepSeek Harness from Scratch, Take You to Tinker with Cyber Lego
It's hard to keep up. I just figured out how to make good use of Codex, and now DeepSeek Harness has arrived.
Over the past few days, we have introduced its plugins, various new gameplay features and the newly launched multimodal capability, but there is still one most fundamental unsolved problem: how on earth should DeepSeek Harness be installed, and how should it be used?
This time we will walk you through the entire process of DeepSeek Harness from scratch, covering installation, first conversation, Skill setup, plugin operation and even uninstallation.
Install DeepSeek Harness with WorkBuddy
To a certain extent, DSH is a bit like lobster: it does not have a complete click-to-install application, only software packages stored in code repositories that need to be installed via the command line.
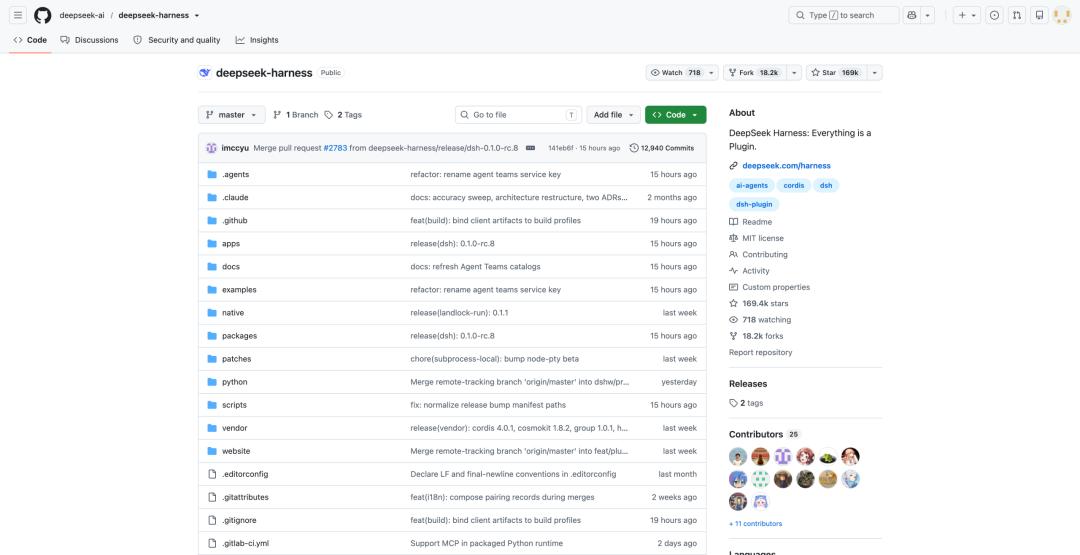
The DeepSeek official team provides two methods. One is to install from source code: get the full project source code, and complete the installation according to the instructions in the repository.
git clone https://github.com/deepseek-ai/deepseek-harness
For users familiar with Git and the command line, this process is not complicated, but a series of subsequent operations such as pnpm install and project building still need to be performed. For ordinary users who only want to experience DeepSeek Harness first, this is more or less discouraging.
So the simpler method is to start it quickly directly through Node.js. After installing Node.js, you only need to enter:
npx @deepseek-ai/dsh web
Most of the AI-native players of our generation who grew up in the "lobster era" already have Node.js installed on their computers. Enter node -v and npm -v in the command line to check if they are installed properly. If neither is installed, just download and install it directly from the official website at https://nodejs.org/en/download.
Normally, after entering the command for quick experience, open the local address http://127.0.0.1:3080 in your browser, and you can start DeepSeek Harness smoothly.

If the startup still fails, you can try third-party applications developed by the community. Many developers have independently developed related applications based on the open-source DeepSeek Harness repository, which can be installed to your local computer with one click just like installing WeChat.
Among them, the desktop version developed by Anywhere Lab has received the most collections. It already has 14,000 Stars on GitHub so far, and is regarded as one of the most high-profile third-party clients.
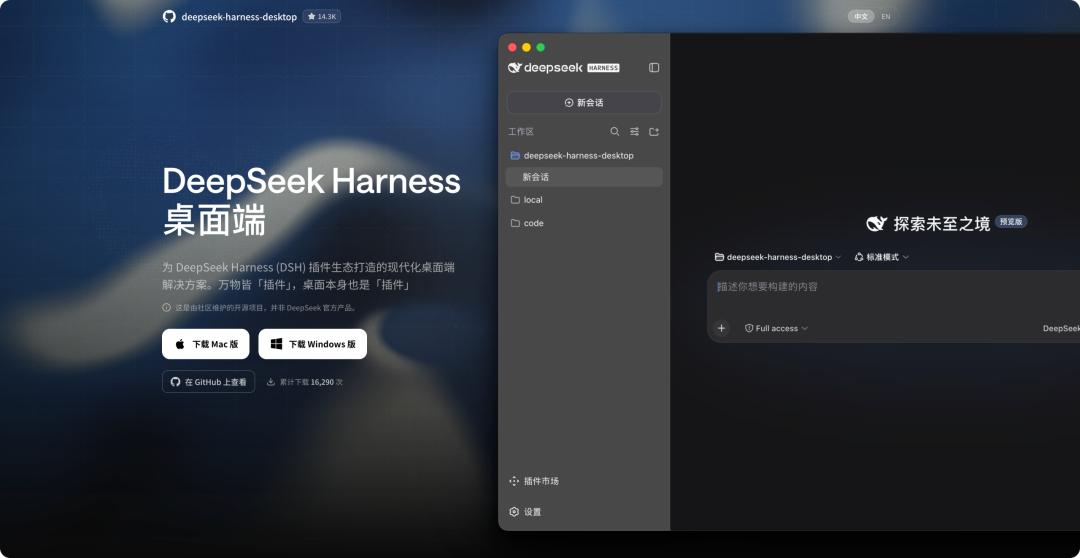
After normal installation, its interface is basically consistent with the official WebUI. The difference is that it adds an entrance to the plugin market, where we can directly find and install interesting plugins.

The ultimate method is: if you don't want to use third-party applications and don't want to tinker with the terminal yourself, leave it to WorkBuddy or Codex.
Back in the internal testing phase, the installation method required deployment from your own GitHub repository, which was completely incomprehensible for beginners. We just sent the project link directly to Codex, and Codex would automatically read the project documentation and help us handle those operations in the command line.

For the same DeepSeek Harness, we can also directly throw the GitHub repository link to Codex: https://github.com/deepseek-ai/deepseek-harness, set Codex's access permission to full access, wait for it to operate step by step, and it will directly open the installed DeepSeek Harness for us.
WorkBuddy also works. Just select "Daily Office", you can specify any local folder as the workspace, or you don't even need to specify it. You don't have to worry too much about the model and thinking intensity, because the installation task itself is not complicated. If more environment troubleshooting is involved in the middle, switch to a higher reasoning level.
Then directly send "Help me deploy this
https://github.com/deepseek-ai/deepseek-harness project to the local machine, so that I can access the service through http://127.0.0.1:3080."
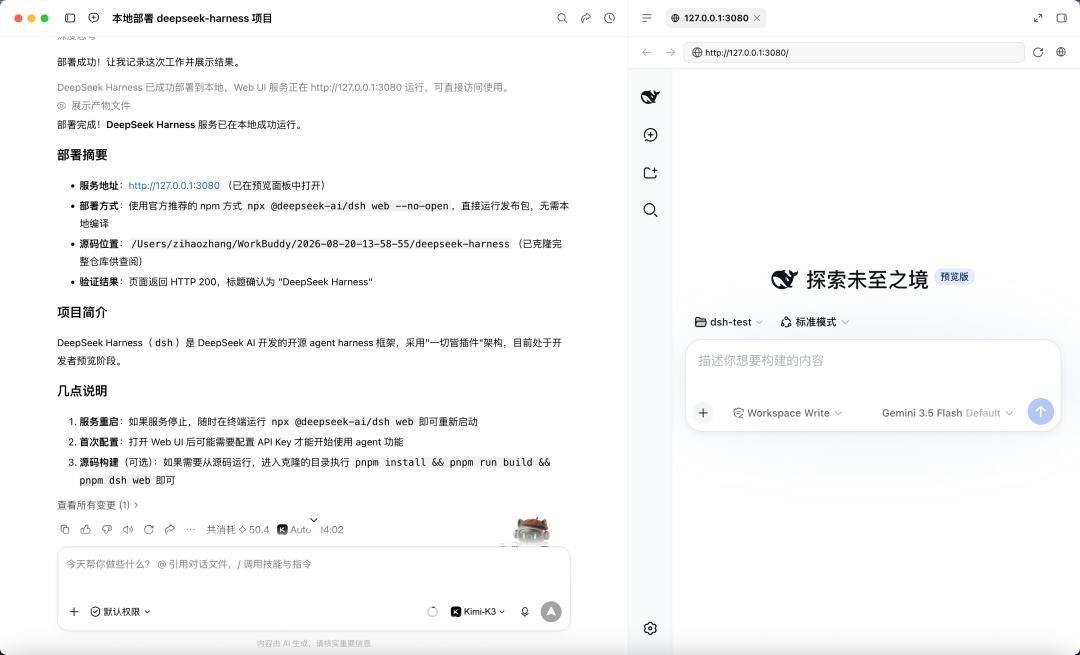
Soon, Workbuddy will help us install the latest version of DeepSeek Harness. When there are subsequent updates, you can continue to talk to it and ask it to help with the update.
In the past, to install an open source project, the first step was to learn how to type commands; now the first step can be to throw the GitHub link to another Agent.
DeepSeek Harness itself is not yet ready for one-click launch, but local computer Agents such as Codex and WorkBuddy have directly eliminated the command line threshold that was the most discouraging for ordinary users, and all subsequent tedious operations can be handed over to DeepSeek Harness.
How to use multimodal in your first conversation
Just like all Agents, the workspace allows us to specify a certain folder, and we can start a conversation directly within this project.

For example, click the dialog box, select any folder on your local computer, which can be a newly created one or one containing specific project files; after selection, we can put forward requirements to DeepSeek Harness.
Generally speaking, you can select the DeepSeek-V4-Pro model and set the reasoning level to Max. Although it costs a little more, it can also reduce the time we spend negotiating with AI.
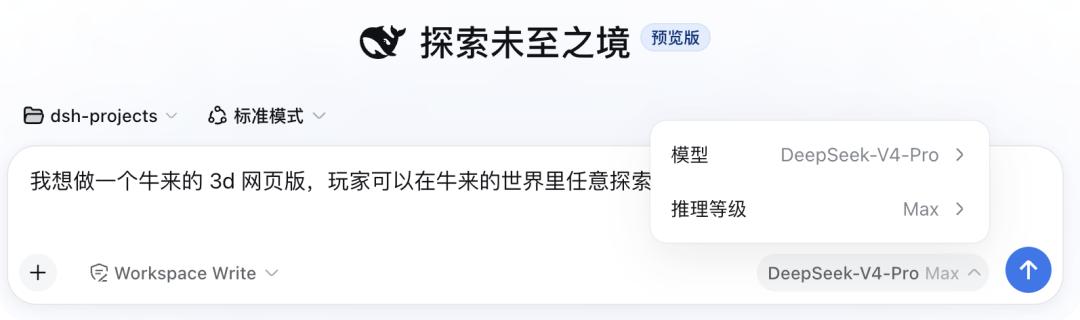
After understanding our requirements, DeepSeek Harness will split the project into multiple trackable tasks, and use the target mode to ensure that the tasks do not deviate from the original requirements.
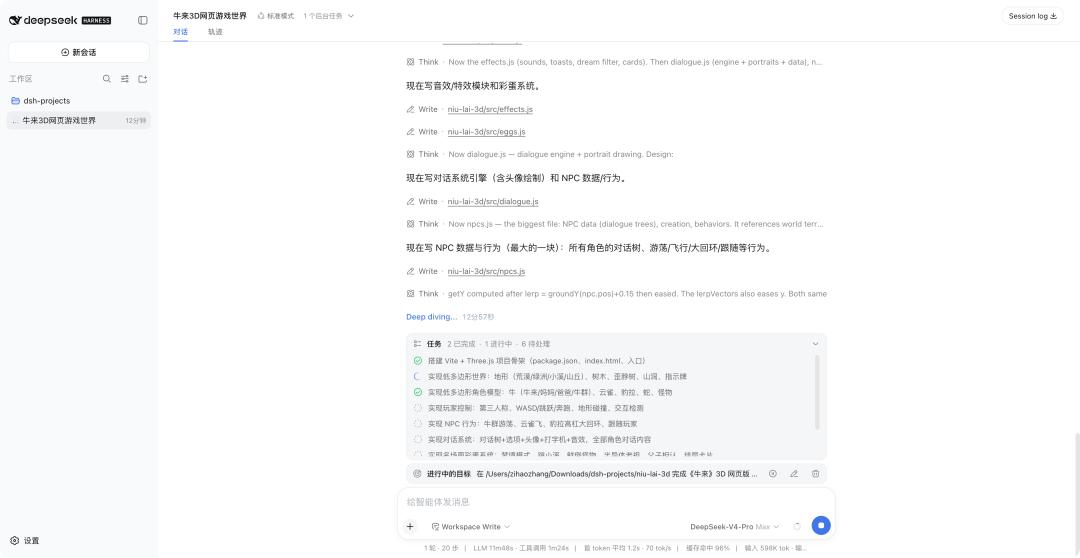
When parts that require our decision-making or authorization approval are encountered in the process, DeepSeek Harness will pop up a notification for us to choose.
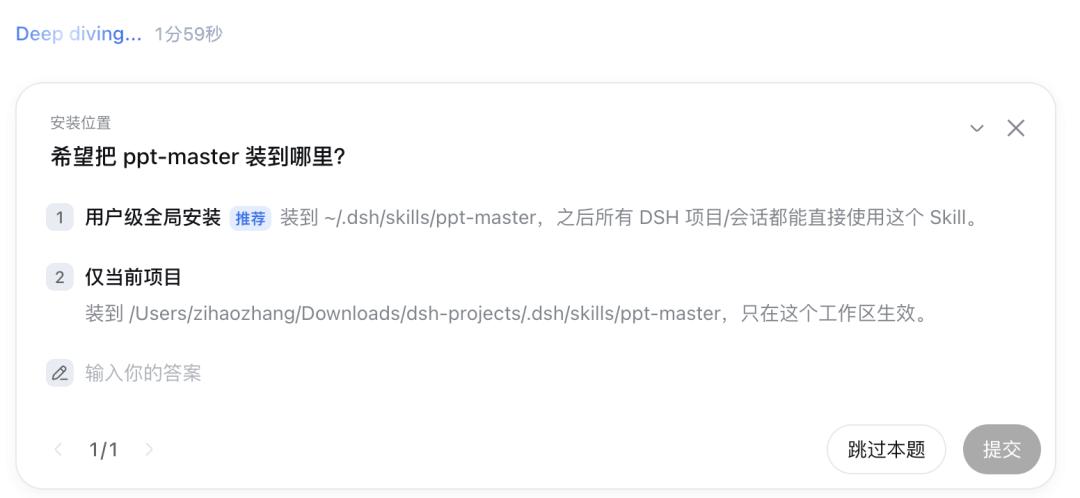
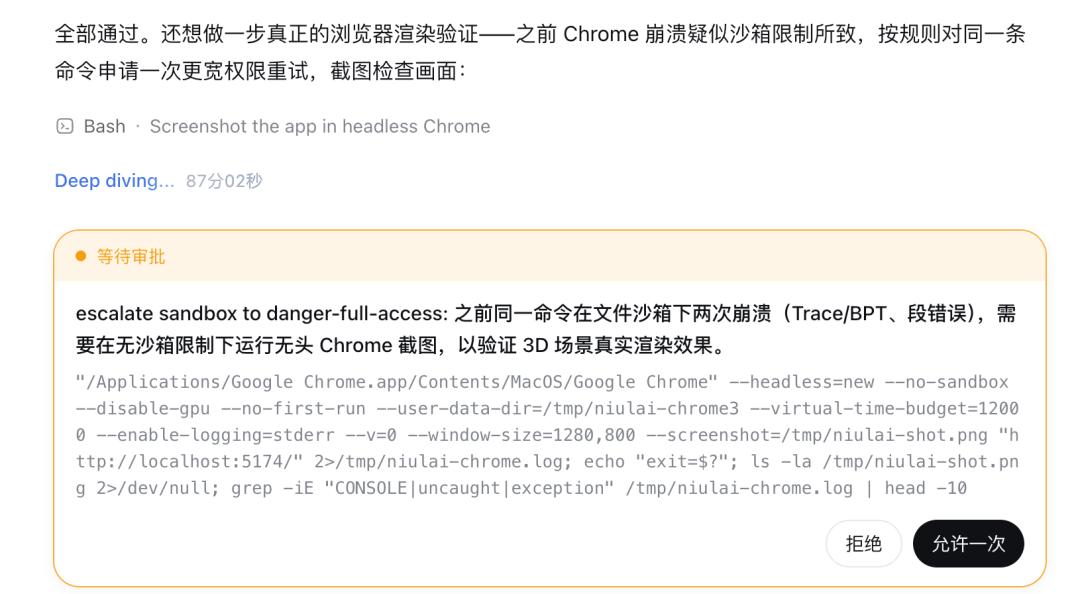
Different from the general web version generation, DeepSeek Harness will continuously call tools to improve the final deliverable. Just like the game "Cow Arrives", the web page generated by DeepSeek Harness is quite playable.
It even recognized the famous scenes such as "Patriarch of Semiconductors", "Crossing the Stream" and "Father and Son Recognizing Each Other".
Simple Q&A or Skills installation can now be handed over to it. For example, we find a PPT Skill online called ppt-master, then directly send in the dialog box "Help me install this Skill
https://github.com/hugohe3/ppt-master/blob/main/skills/ppt-master/SKILL.md"
After the installation is completed, directly ask it to use this Skill to make a PPT for the Chinese class, with the content of "Moonlight over the Lotus Pond" written by Zhu Ziqing.
DeepSeek Harness will follow the requirements of PPT Master Skill, automatically open a new browser tab, and ask me to confirm the design scheme.
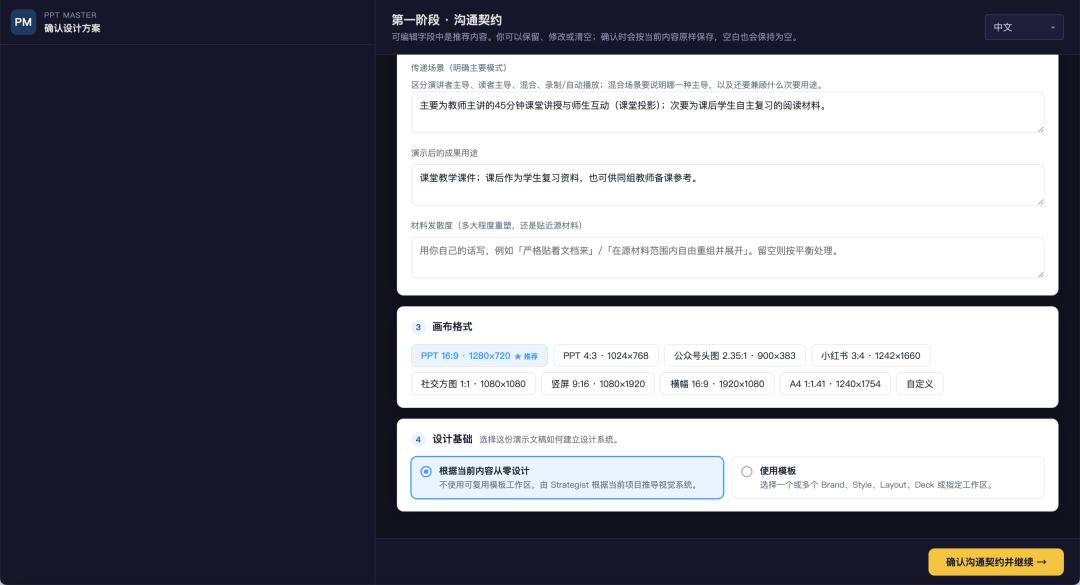
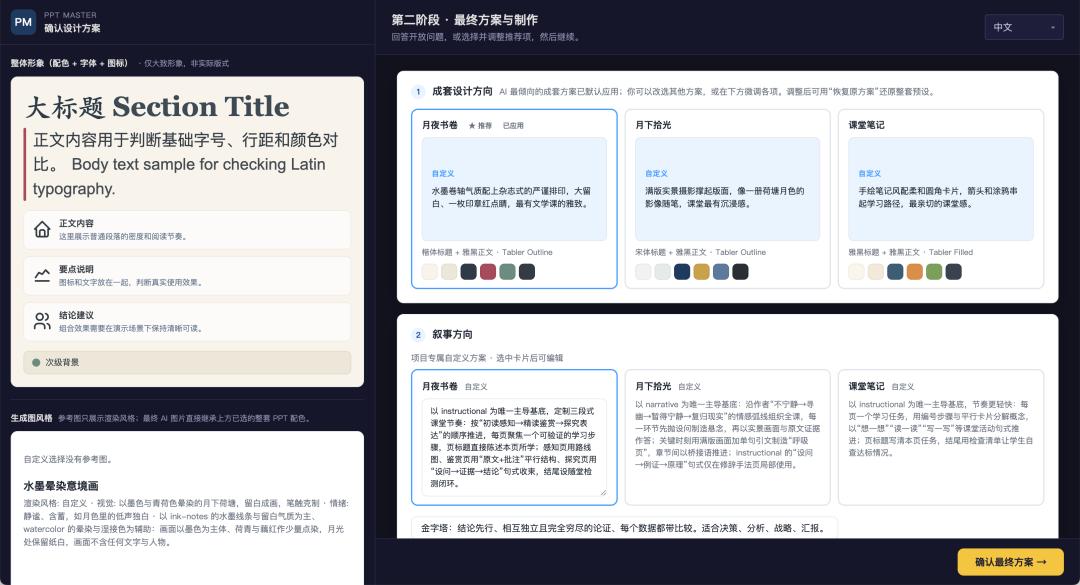
The final generated effect is indeed very good.

What makes it different from other Agents is the newly added "Trace" page of DeepSeek Harness, which clearly shows which tools are called, the assistant's responses, context injection and Token usage.
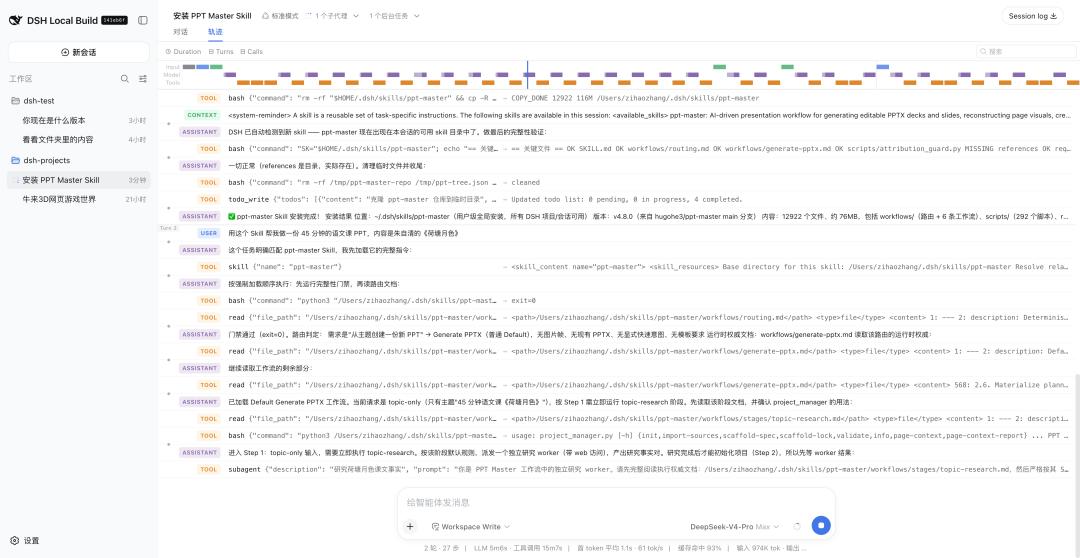
It also has multiple different operation modes to handle different tasks.

The basic usage is roughly as above. If we start from a local folder with existing files, we can also ask DeepSeek Harness to help us organize the files.
Coincidentally, the recent update of DeepSeek Harness added the multimodal feature. The changelog of 0820 says "New Feature: Enhanced multimodal support, the DeepSeek model adapter supports configuring and enabling native image requests, commands such as /goal and /plan can receive image and text input, and the @ menu supports referencing files and sessions"
But the actual situation is that Harness has become multimodal, but the DeepSeek model currently in use has not.
When DeepSeek Harness encounters an image file to organize, it will still report an error, indicating that DeepSeek-V4-Pro is not a multimodal model and cannot read the image content.
