Stop saying that Mac is difficult to use. Master this key shortcut and you will become a "real pro".
In our previous article *How Many Useful Tricks Does macOS Preview Have?*, we focused on the versatile "Preview.app" on macOS. In this post, we will continue exploring similar practical workflows.
In daily use, we often notice that experienced users rely heavily on keyboard operations. This article is all about keyboard shortcuts, but it centers on just one single key: the Option ⌥ key. Most macOS users are already very familiar with the Command ⌘ key, as nearly all common shortcuts depend on it to trigger functions. The Option key, however, lives up to its icon ⌥ — it reveals the hidden, alternative side of menus and system options.
By reading this guide, you will master a range of Option-based operations to speed up your macOS workflow, making you look like a seasoned pro. With enough practice, you might even become a true power user who keeps their expertise under wraps.
Option + Finder
When talking about macOS, people often naturally compare it to Windows. In this analogy, Finder on macOS is exactly what File Explorer is to Windows.
Finder is the core window management tool on macOS, granting users access to nearly every corner of the system. With the help of the Option key, your operations in Finder will become far more agile and efficient.
Path Display and Quick Navigation
To be honest, when I first switched to macOS, I really missed the File Explorer on Windows. Its top address bar clearly shows the full current path and lets me jump between folders freely. In fact, with the Option ⌥ key, Finder can achieve this exact same functionality.
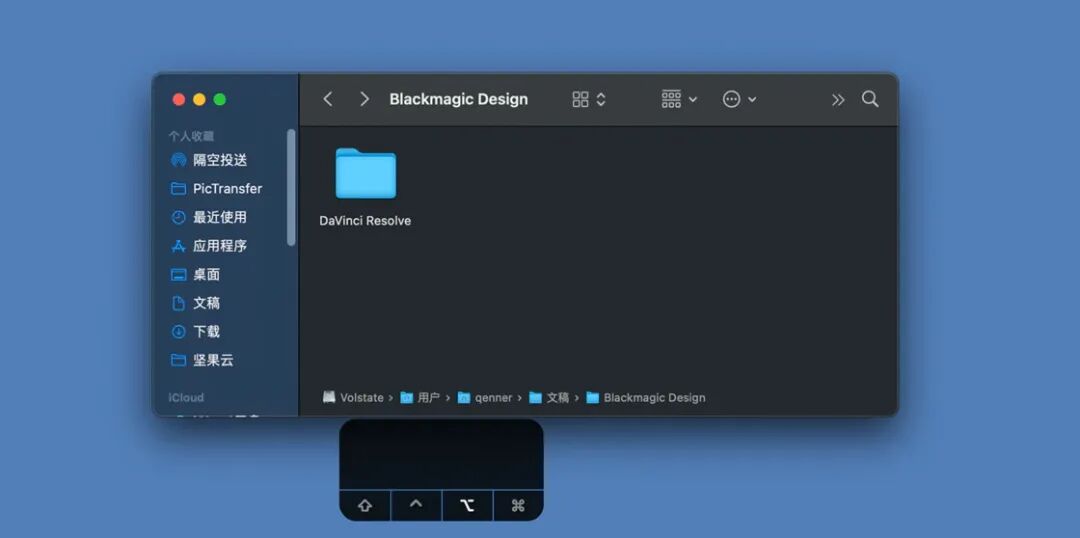
In any Finder window, hold down the Option key, and the full path of the current folder will appear at the bottom of the window. Click any folder in this path to jump directly to that location.
File Copy Operations
Cut Files on macOS
For users who have just switched from Windows to macOS, the lack of a native Ctrl + X cut function for files is a common pain point. At this time, you can use the Option key to implement the cut function, and there are generally two ways to do this.
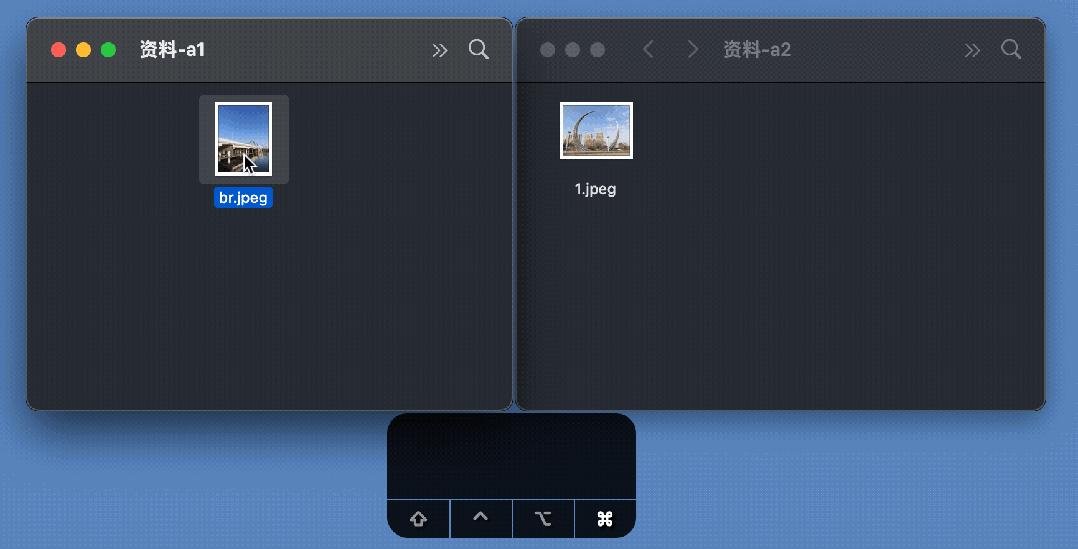
The first method, which is also my most frequently used one, is to copy the file with Command + C, then go to the target folder and press Command + Option + V to achieve the same effect as cutting a file on Windows.
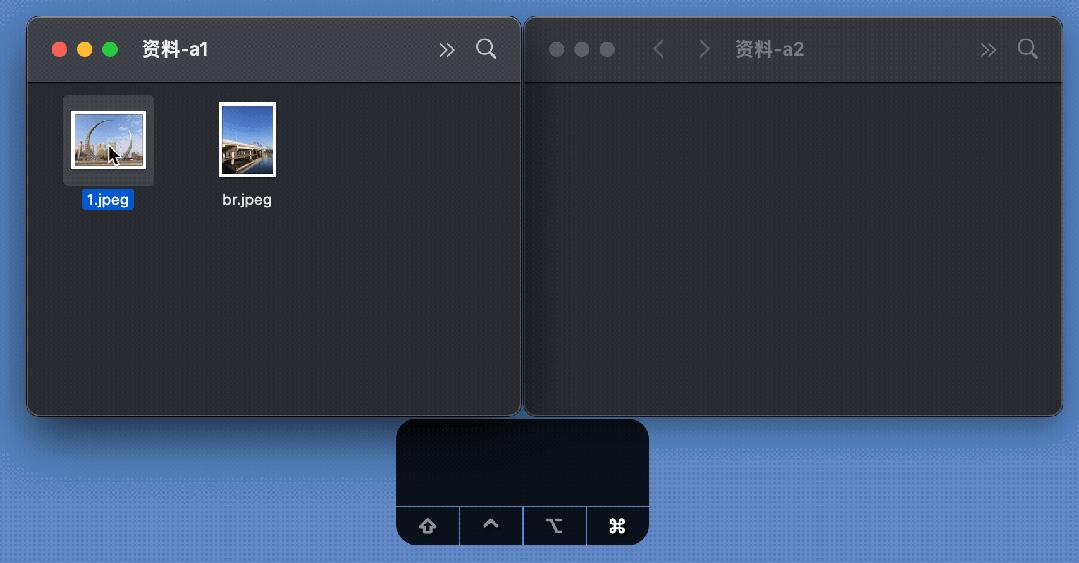
The second method is: after copying the file with Command + C, go to the target folder, hold down the Option key, right-click the blank area, and select "Move Item Here" to complete the cut operation.
Fast File Duplication
When it comes to copying files, the standard keyboard workflow on macOS is Command + C followed by Command + V. But you can use the Option key to copy files much faster.
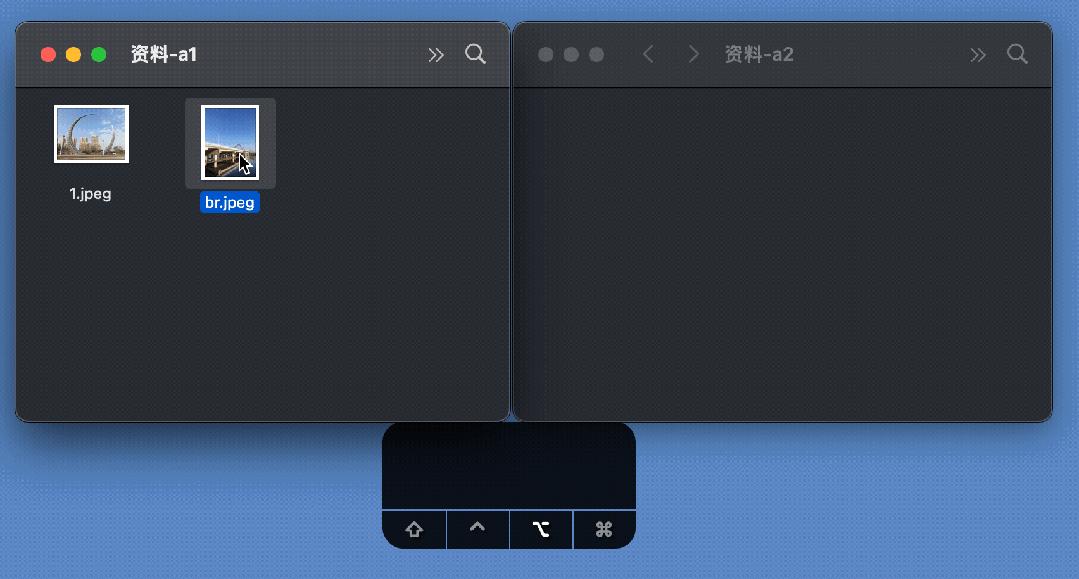
Simply put: open two separate Finder windows, hold down the Option key, and drag a file from its current folder to the target folder with the left mouse button. If you drag the file within the same folder while holding Option, you will instantly create a duplicate of the selected file right in its original location.
Exact Duplicate
Modern macOS systems use the APFS file system, so the standard "Duplicate" operation is extremely fast, and the new duplicate file takes up almost no extra disk space.
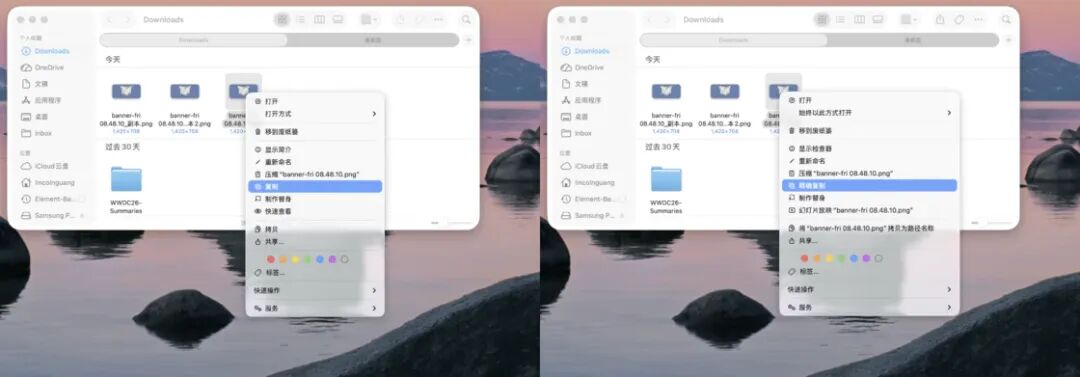
If you hold down Option + Shift in Finder, you will notice that the "Duplicate" option in the menu changes to "Duplicate Exactly". This hidden feature rarely appears in the regular user interface, and many people who have used Macs for decades have never seen it.
At first glance, there seems to be no difference between the two duplication methods: the file content is identical, the filenames are the same, and under the APFS system, both use APFS's instant copy feature to take up almost no extra disk space. But the difference lies in the file metadata.
The standard "Duplicate" treats the new file as a "new copy belonging to the current user", so after duplication, the owner of the new file becomes the currently logged-in user. "Duplicate Exactly", by contrast, preserves all the original file's permission information as much as possible, including the owner, user group, and POSIX permissions. Since this step modifies administrator-level attributes, Finder will prompt you to enter your admin password to complete authentication.
For most users, this difference has almost no impact. But if multiple people share this Mac with separate user accounts, "Duplicate Exactly" ensures that the original owner of the file can still access and edit the duplicated copy normally.
Advanced Folder Operations
Quickly Duplicate or Merge Folders
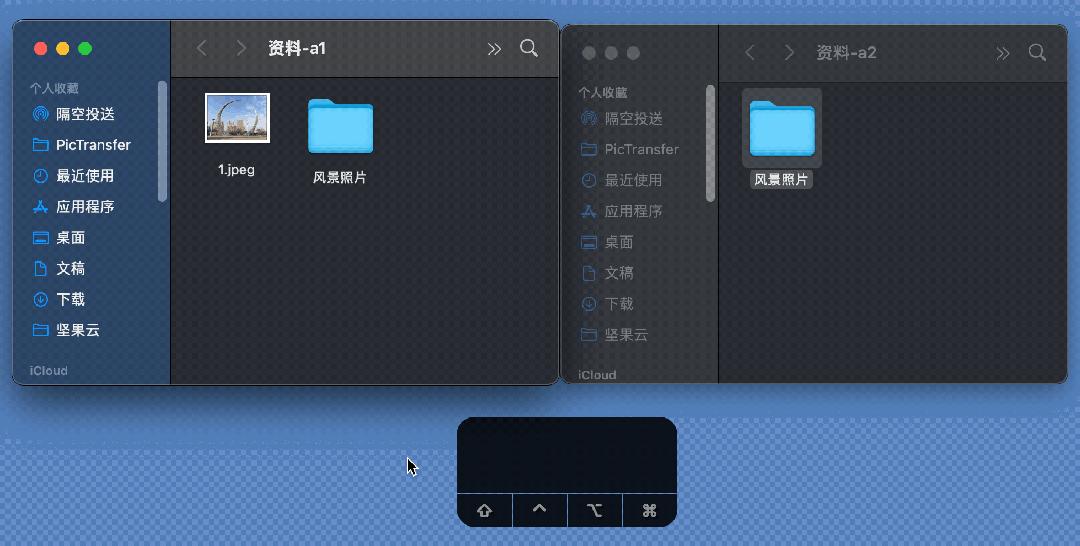
We mentioned fast file duplication earlier, and this shortcut also works for folders. Hold Option and drag a folder with the left mouse button to quickly create a full duplicate of that folder at the destination location.
If a folder with the exact same name already exists at the destination, you will be given the option to merge the two folders, instead of only having the "Replace" option.
Open Multiple Folders Simultaneously
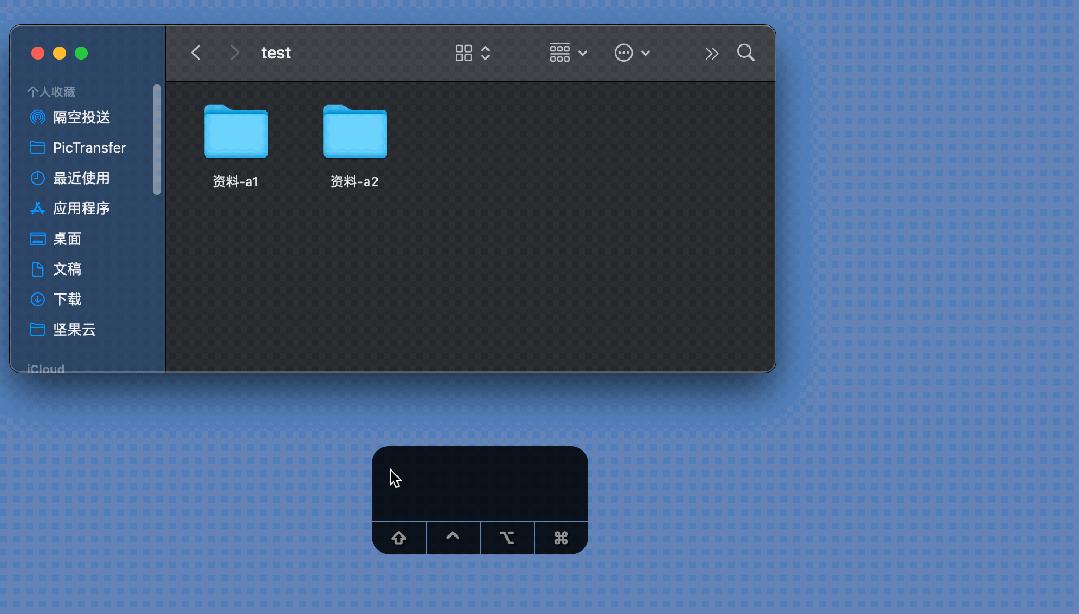
On Windows, you can select multiple folders with your mouse and press Enter to open all of them at once. You can do the same thing on macOS: select multiple folders, hold down the Option key, and double-click any of the selected folders to open all of them in separate windows.
Enhanced Right-Click Menu for Files and Folders
When you hold down the Option key and right-click a file or folder, the right-click menu will change significantly compared to the regular right-click menu. These changes can include modifying the default app to open the file, enabling full-screen preview of the file, copying the full path of the file, or opening it in a new tab / new window. The exact extra options depend on your Finder settings.
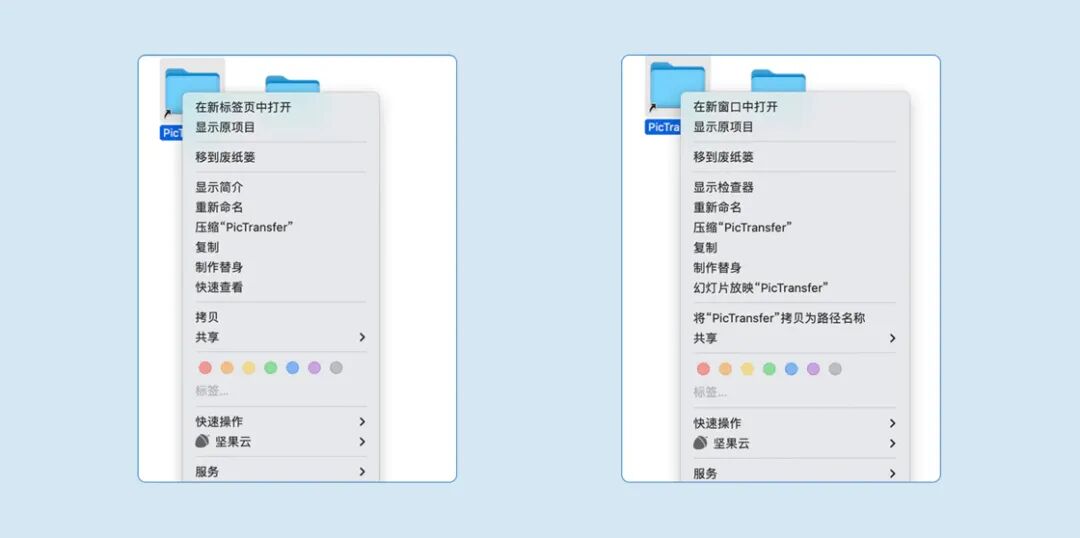
Right-click menu comparison: left side without pressing Option, right side with pressing Option
The Option key can also bypass macOS's Gatekeeper security system when opening apps. If you see a warning popup that prevents you from opening an app, right-click the app icon, hold down Option, and select Open to launch the app normally. Note that you must confirm the app you are installing comes from a trusted, unmodified source, otherwise it may compromise macOS security and your personal data.

Modify File Default Open App
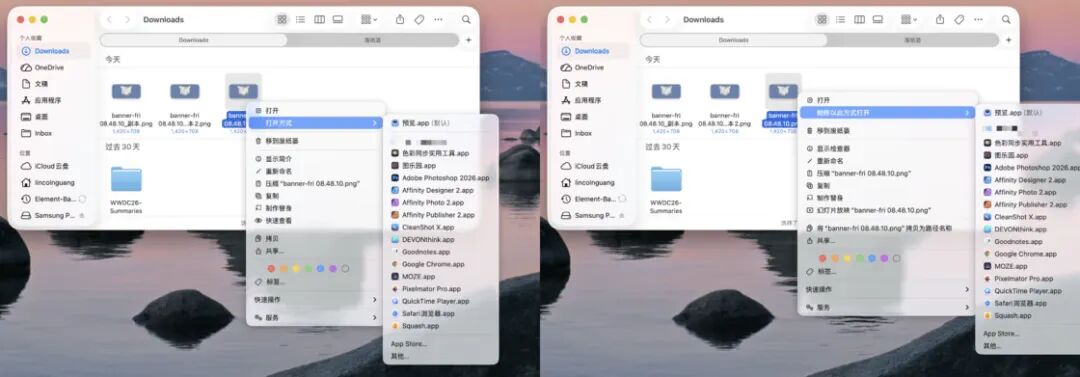
A single file type on macOS can often be opened with many different apps. If you want to permanently change the default open app for one specific individual file, simply hold down the Option key when opening the right-click menu. If you want to permanently change the default open app for all files of that type, you will still need to use the "Get Info" panel, go to "Open With", and select "Change All".
Option + macOS GUI
GUI stands for Graphical User Interface, which refers to the graphical interface you interact with when using a computer. The GUI can be roughly understood as all the visual elements you see when you normally use macOS. With the "Option +" shortcuts, you can discover a completely "different" side of macOS.
More Detailed Hardware Information
Some system hardware status indicators on macOS can display far more detailed information than what is shown by default. By combining the Option key with standard shortcuts, you can access more granular operations and system details.
Display Advanced Status Details
The macOS menu bar has various small icons that show the status of software and hardware. Just as we mentioned earlier, holding down the Option key changes what you see, and this applies to the status icons in the menu bar too.
Hold down the Option key and click on the Wi-Fi, Bluetooth, Volume, or Time Machine icon, and each will display advanced technical information that is very useful for troubleshooting computer issues.
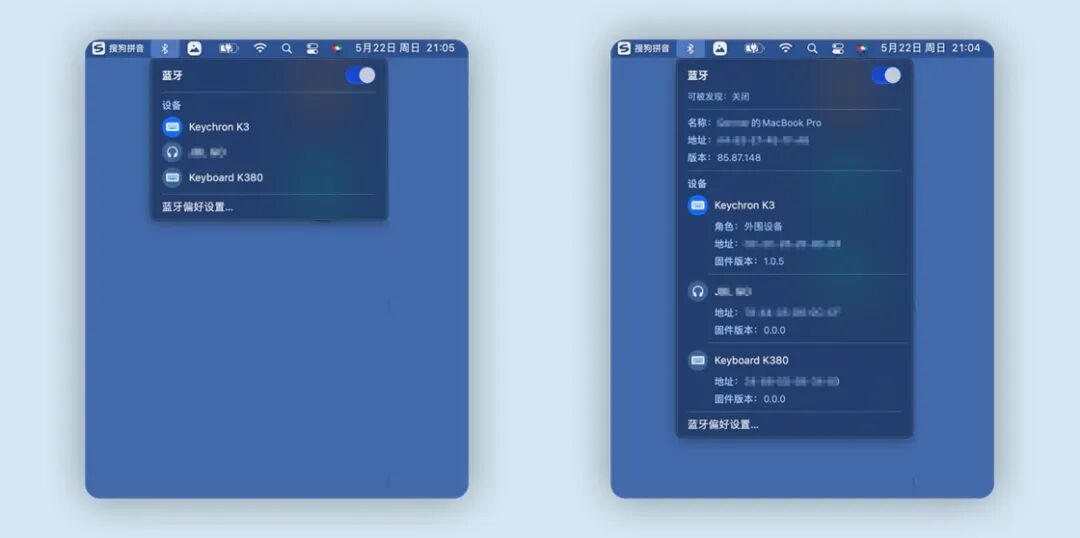
Bluetooth right-click menu comparison: left side without pressing Option, right side with pressing Option
Make More Precise Adjustments
When talking about the GUI, we cannot ignore macOS's hardware control functions. We have all encountered situations where a small adjustment is too much, and the next small adjustment is too little, making it impossible to get the exact value you want. This problem can be solved for more precise control.

By pressing Shift + Option + Volume / Brightness key, you can split each full adjustment step into 4 smaller increments, achieving 1/4-step precise adjustments.
One-Click Focus Mode

If you use a non-Apple keyboard, you usually cannot enable Focus Mode on macOS with one keystroke. But as suggested by our readers, you can press Shift + Option and click the date and time in the top menu bar to instantly enable the default Focus Mode: Do Not Disturb.
Hidden Window Features
When you click the green maximize button on any open window (whether it is a folder or a document), holding down the Option key will change its behavior. The main difference is that holding Option while clicking the green button will resize the window to fit all its content properly, instead of entering full screen mode, and let you adjust split-screen layouts more flexibly.

Comparison before and after pressing Option: left side without pressing Option, right side after pressing Option
In addition to the green button, the scroll bar behavior in windows will also change when you hold the Option key. Pressing Option will activate an alternative scroll bar navigation style; whether this works depends on your scroll bar click settings in System Preferences.
Hidden Dock Options
When an app is running, hold down the Option key, right-click the app's icon in the Dock, and you will get options to Force Quit the app and Hide all other running apps.
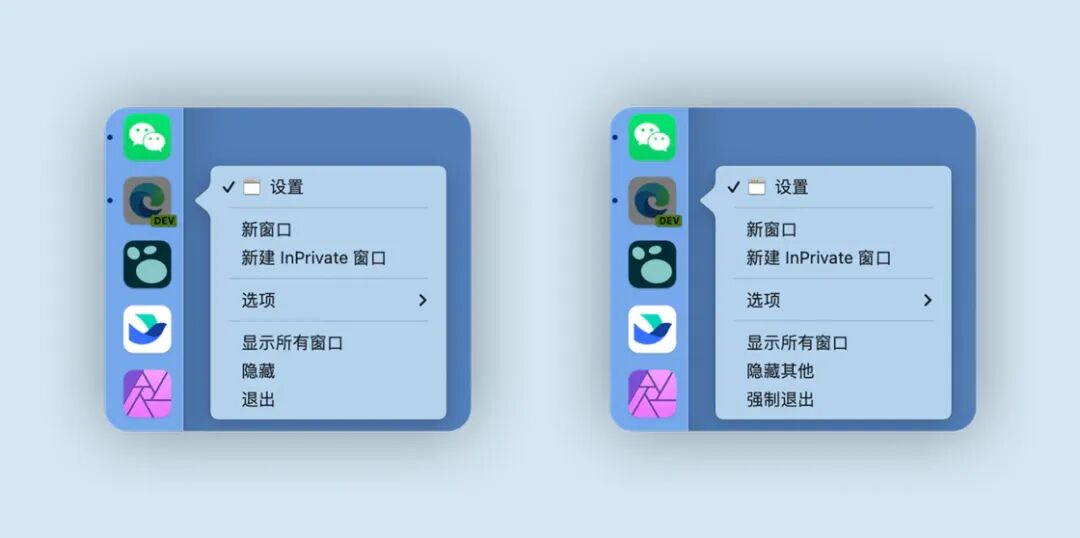
Comparison before and after pressing Option: left side without pressing Option, right side shows Force Quit after pressing Option
Bypass Confirmation Dialogs
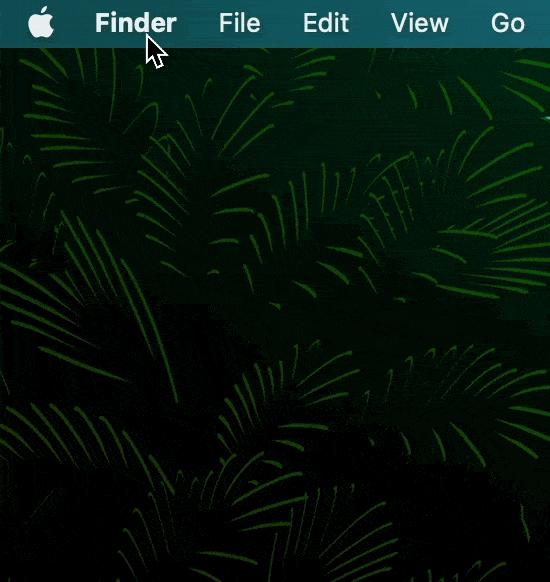
The Option key can also skip extra confirmation popups. For example, hold down Option and click Delete File in