Can ordinary people also engage in hardware development? This is so typical of "He Xuesong".

Striking a balance between professionalism and user-friendliness is a threshold that AI hardware platforms must cross.

Text | Li Jiaxing
Editor | Zhang Wei
Cover Source | Unsplash
Have you ever thought about making a small electronic gadget that you can't buy on the market by yourself?
Every time I watch videos of Mr. He and Zhihui Jun, I can't help thinking: I wish I could make one too.

Source: "We Built a Magic Piano..." from Mr. He's channel
All kinds of weird ideas pop up in my mind from time to time, but when I think about making circuits and writing programs by myself, I have no idea where to start.
When will hardware development be accessible to the general public?
In May this year, I met the Viewleap team at MiraclePlus, and they seem to be able to endow me with the "superpower" of a geek.
Viewleap is an AI hardware development platform, and their product is STACK ANYWAY. What they want to do is simple: to enable people without complete engineering training to make their own hardware, and to help those who already have the ability to do it faster.
At that time, the team had just received investment from MiraclePlus, and the product was still in the early stage, not open for internal testing yet.
A month later, I met them again at WAIC. This time, Viewleap opened internal testing, and I also got a quota.
When an ordinary person puts forward a vague demand, how far can AI take him? I want to give it a try.
According to Viewleap's vision, users only need to say what they want to do in natural language, and the system will break down the sentence into components, connections and code projects in the 3D workbench. Users buy the components and then assemble them according to the diagram.
So, I spoke out my idea: "There are many kittens in the company, and I want to make an electronic cat teaser." Of course, if you don't know how to use it at the beginning, you can directly ask it how to get started.
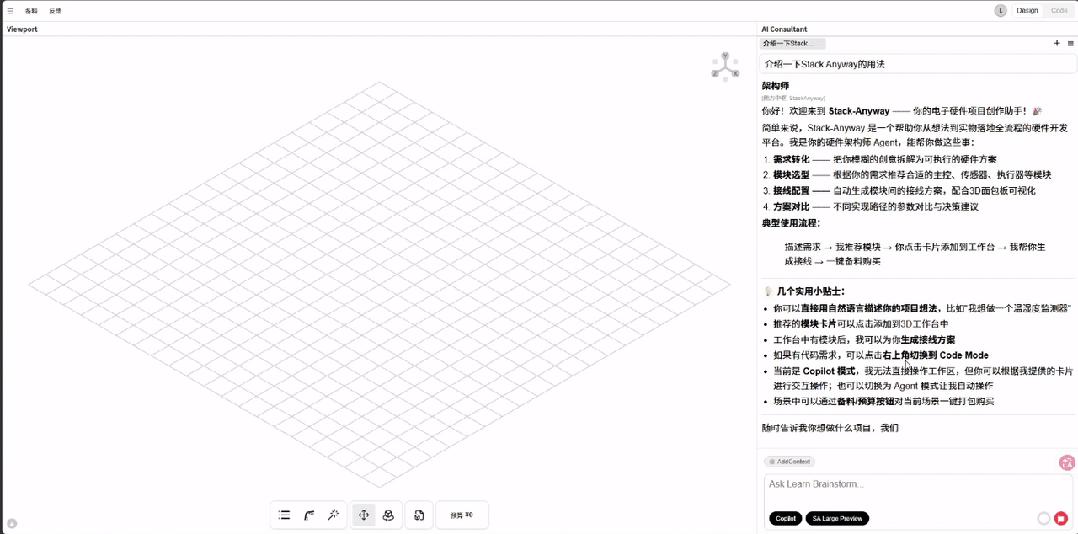
Enter the demand and discuss the design scheme of the cat teaser with AI
After this sentence, the platform will decompose the vague idea into an executable hardware solution, and recommend suitable electronic modules such as main control units, sensors and actuators according to the demand. The workbench that was originally empty on the left will be filled with electronic components one after another.
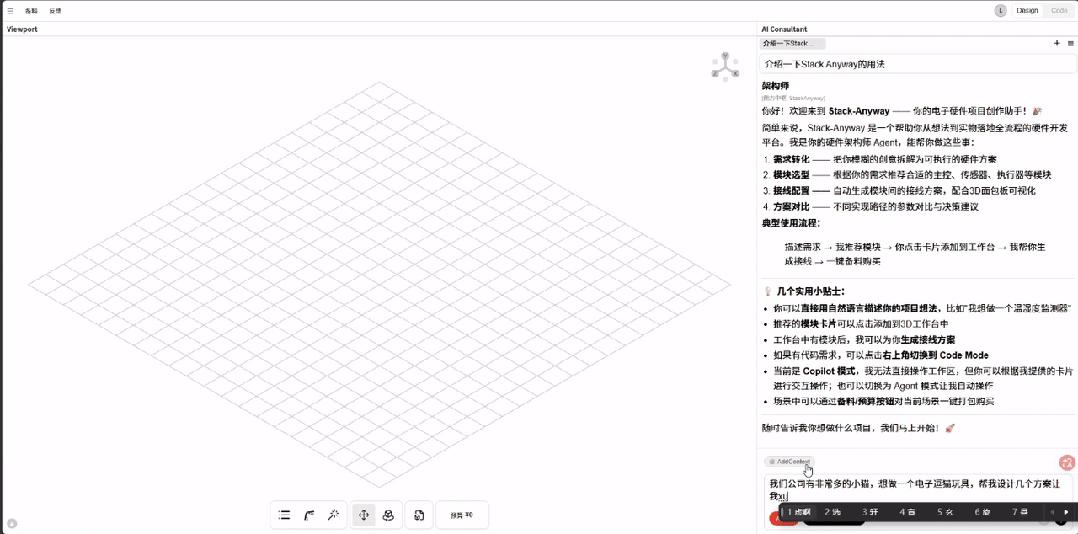
The electronic components recommended by the platform appear on the 3D workbench one after another
The platform proactively asked questions about my needs and provided four sets of solutions for me to choose from. Some are low-cost basic gameplay, while others are richer with more complex functions to implement.
One of the solutions is to let two servos drive the laser pointer to rotate, and use the moving light spot to attract cats.
I understood the logic of this solution, and it didn't seem complicated to implement. I decided to try this one first.
The platform then listed a component list, and explained how these parts should cooperate with each other. For example: the main control unit is responsible for issuing instructions, the servo controls the direction, and the infrared sensor detects whether there is any object moving around.
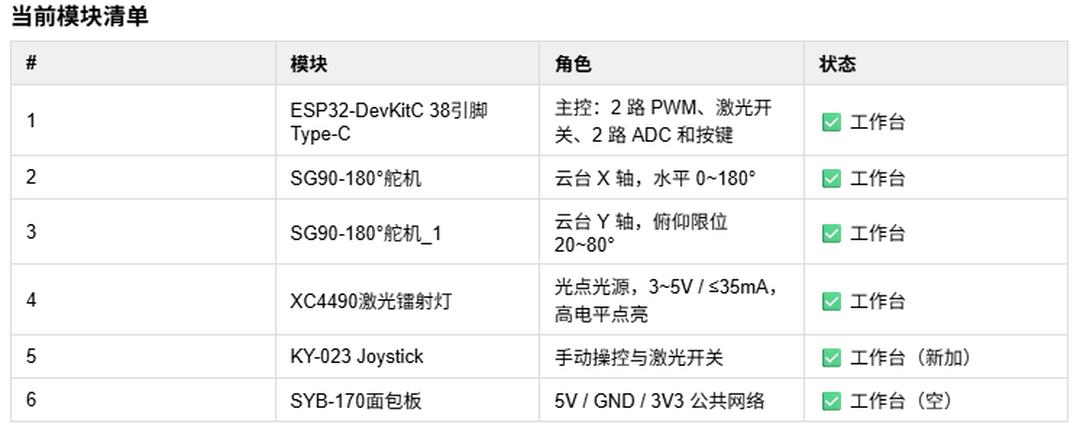
Module list of Solution 1
The next problem is: I don't understand the principle of each electronic component, let alone complete the wiring between electronic components.
In the traditional approach, you usually have to find a similar tutorial first, figure out the purpose of each wire, and then find the correct insertion position according to the marks on the development board. But tutorials are usually for specific component models. If you change the module or want to add functions, you have to learn relevant hardware knowledge by yourself.
The platform also did this step for me. It generated a connection scheme based on the selected components, and drew the connections in the 3D workbench. I can follow a single wire to see which module it starts from and where it connects to the main control unit.
When the components are bought back, I still need to plug in the wires by myself. But at least, I have a diagram to refer to.
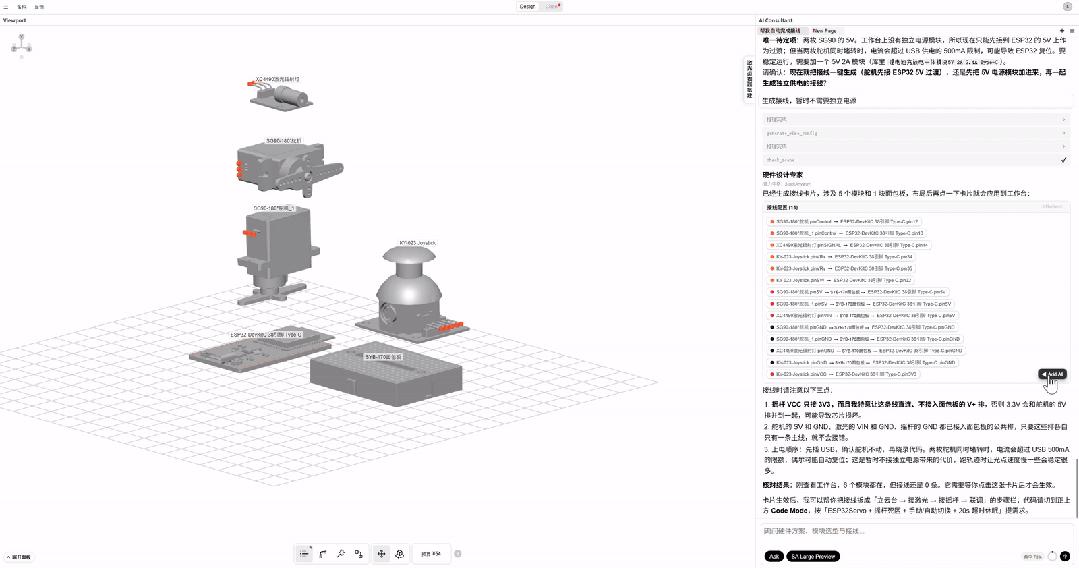
Wiring scheme generated by the platform
In the toolbar at the bottom, I found that the platform also provides a schematic diagram of the wiring.
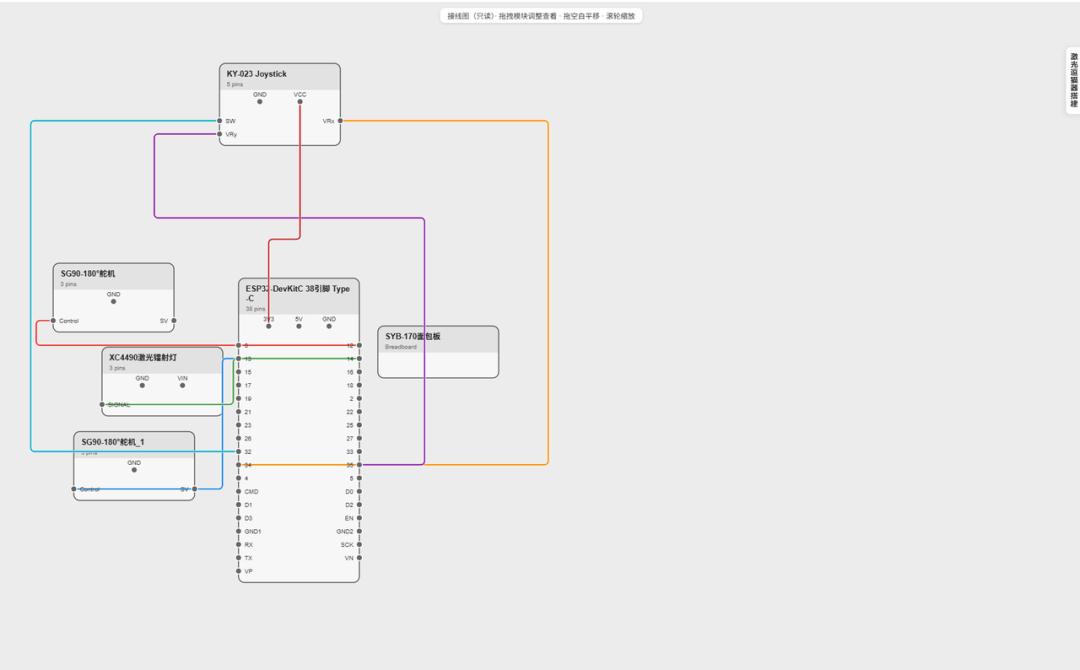
Schematic diagram of wiring
With a rigorous attitude, I threw both the schematic diagram and the wiring scheme to Codex to check them again.
Codex gave feedback that the wiring scheme was fine, but the schematic diagram missed quite a few wires.
After repeated comparison, I found that the wires missed in the diagram this time were all the connections passing through the breadboard.
Fortunately, this episode didn't delay too much progress. What trapped me for several weeks was the subsequent assembly.
I found that the 3D workbench is not equal to a complete product. I wanted to arrange them into a real cat teaser. As a beginner, I had no idea where to place the servo, where to point the laser pointer, and whether the final shell could fit all the components.
In this experience, the platform cannot automatically complete such spatial layout. I need to figure out the general installation method first, then drag the components manually to adjust their positions.
As for the shell and the brackets for fixing parts, I also need to make them by myself.
The platform will provide some reference 3D printing model links according to the solution. For friends who already know technology, they can refer to these models for further modification.
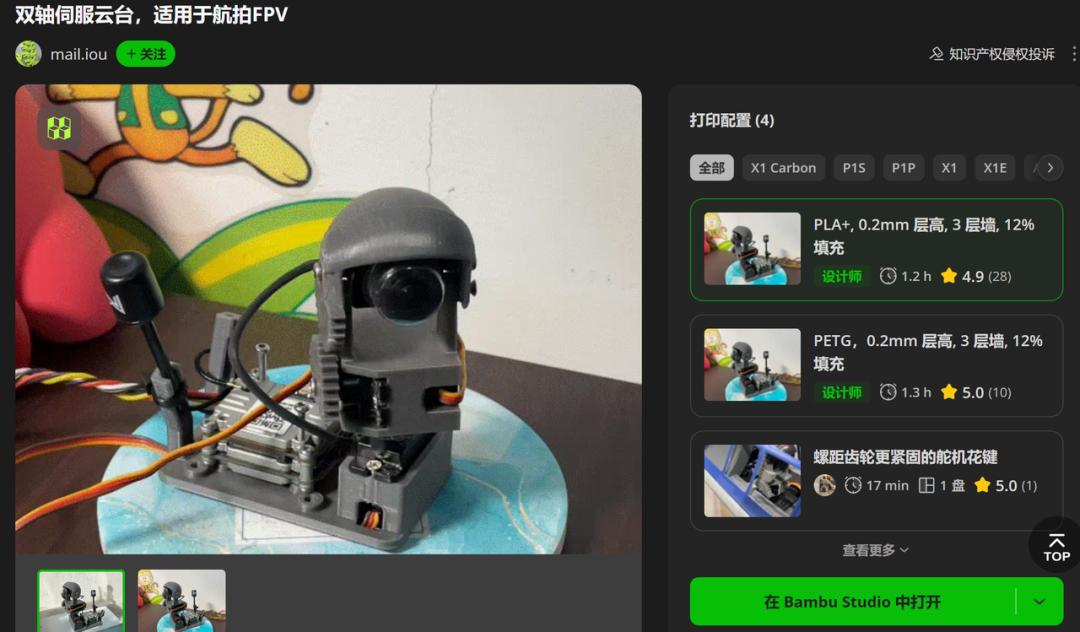
Reference 3D printing links given by the platform based on my solution
The procurement step saved me a lot of trouble. I directly selected the required components on the platform and placed an order with one click. Three days later, a box was delivered, and all the supporting electronic components in the solution were packed inside. The parts on the screen were finally placed on my desk.
As for the structural problem that trapped me, I finally asked a friend for help. He helped me design the mechanical structure, and then I connected the components according to the wiring diagram. The cat teaser finally looked like the following.
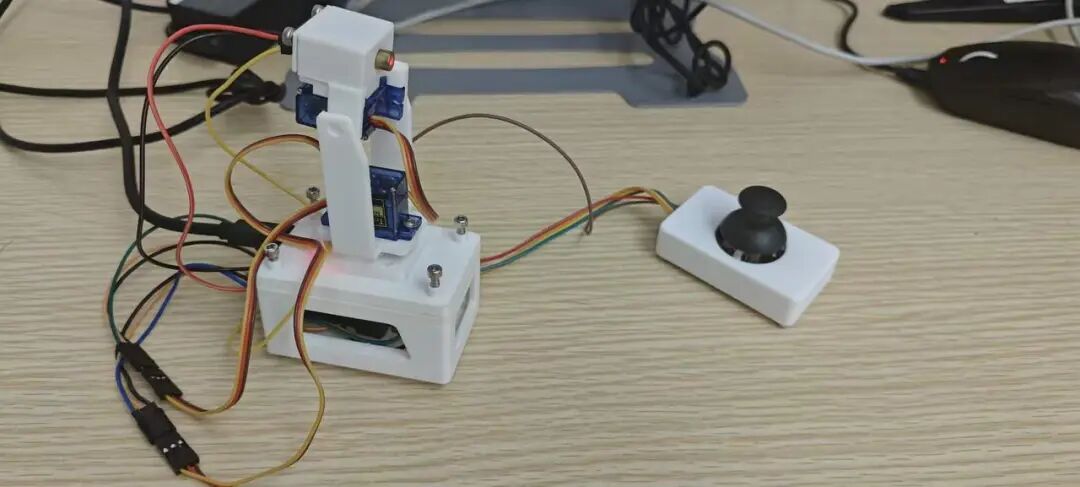
Homemade electronic laser cat teaser
After the parts were connected, I entered the code configuration stage.
To write hardware programs, you also need to make the code match the physical objects on the desk. If you directly use a general AI to write code, I have to first explain to it what main control unit I used and which components I connected. However, when there are seven or eight electronic modules and thirty or forty wires on the desk, it is difficult for an ordinary conversational Agent to know exactly what the state of the user's desk is.
What the platform wants to make up for is exactly this step. The system can read the configuration and connection relationships in the previous workbench, and use this information to generate underlying code, such as pin definition, PWM output conversion, and servo parameter setting.
In addition, the platform can also read the information transmitted back by the development board through the serial port, check the operation status, and then continue to modify and test according to the results.
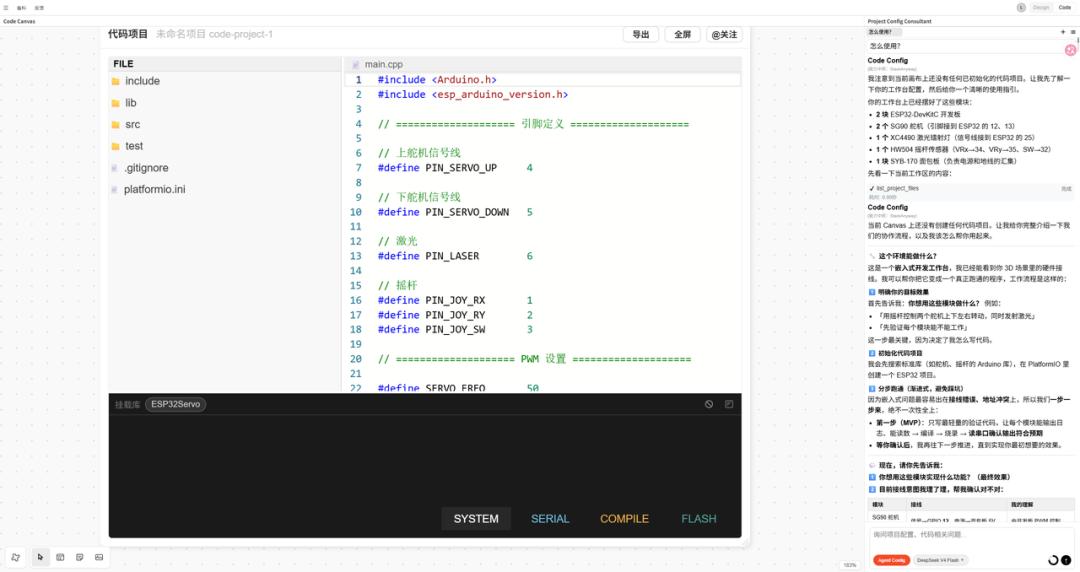
Code configuration interface
The actual experience is not that complicated.
One word: fast.
I talked with the model for less than half an hour, then I heard the buzzing sound of the servo running. I turned my head and saw that the laser module was also lit up.
For people who make hardware for the first time, watching a bunch of static components start to respond is itself a powerful Aha Moment.
After working on it for so long, I finally got a response.
However, new troubles also emerged from this point.
When I pushed the joystick, the rotation direction of the two servos did not match my expectation: when pushing left and right, the servos rotated in both left-right and up-down directions at the same time; when pushing up and down, the servos did not respond at all.
I told the AI hardware generation platform the actual connected interfaces of each wire one by one, and asked it to modify repeatedly, but the problem was still not solved. Finally, I gave the same problem to Codex, and the code was quickly written and worked properly.
Striking a balance between professionalism and user-friendliness is a threshold that AI hardware platforms must cross.
"Getting it to work" is the current priority of the platform, said Xu Shizhe, CEO of Viewleap.
"The positioning of our code configuration stage is actually an Agent for hardware project configuration. Its main purpose is to help users get the effect to work; at the very least, first get the connections between components connected, and write the underlying hardware code well."
But "getting it to work" is not equal to "getting it to work accurately", let alone "making a finished product".
For me, whether the joystick can control the servo as expected is the key to whether the cat teaser is easy to use. But in Xu Shizhe's vision, what the platform needs to shorten at this stage first is the time from when an idea is spoken out to when it can be verified with a physical object.
"For consumer hardware, the most important things are speed and verification, especially in the C-end. The market window for hardware products may only be three or four months, and the product life cycle may only be half a year. Products often need to make several versions first, verify whether it works, then quickly